
Thursday, December 12, 2013
Mustache and Chevron Mug Rug
I whipped up this mug rug as an add on to a secret santa gift my daughter was giving to a friend. OK, it's a little wonky... But cute, right? It was machine embroidered and I used left over fabric from some pillows I made.
Sunday, November 24, 2013
Red Bow Ties - Anyone Thinking Doctor Who?
Having just watched the latest episode of Doctor Who, I created this cute quilt that is reminiscent of the 11th Doctor's bow tie. OK, only as I am looking at this quilt now did I relate it to the Doctor. Still, it does pay homage...
Here's how I made it. I had some jelly roll strips left over from another project - of which I have no recollection what that project was. Humph! Anyway, I started with half square triangle squares of red and yellow, then added the jelly roll strips to only two sides of the square - the red triangle sides. I added an additional strip to one side creating a rectangle. I love how this created sort of an off-set red bow tie. Since this is such a scrappy quilt I added sides and top fabric scrappily alternating red and yellow. I think it turned out to be a super-fun quilt top. I hope to quilt it soon. Sorry Whovians - next time I will make it in Tardis Blue and red.

Here's how I made it. I had some jelly roll strips left over from another project - of which I have no recollection what that project was. Humph! Anyway, I started with half square triangle squares of red and yellow, then added the jelly roll strips to only two sides of the square - the red triangle sides. I added an additional strip to one side creating a rectangle. I love how this created sort of an off-set red bow tie. Since this is such a scrappy quilt I added sides and top fabric scrappily alternating red and yellow. I think it turned out to be a super-fun quilt top. I hope to quilt it soon. Sorry Whovians - next time I will make it in Tardis Blue and red.
Strippy -Scrappy - Pink Floral and Happy
I attended a quilt guild meeting where they had a scrap swap. I came empty handed, but at the urging of swappers, was offered a few scraps to take home. Feeling guilty about taking without giving, I challenged myself to use these scraps and make something great. The scraps were actually a few strips and a couple of pieces of coordinating fabric - less than 1/4 yard each. I liked the 3 dudes quilt from Missouri Star and tried to make it. U fortunately, I laid the pieces out wrong and had a "very special and unique" set of blocks. I chose to forge ahead with the special blocks - now named 3 dudes and one nutty gal block. I added pieces of white to make a bit of an off-set pattern. Once I put it all together, it was a very white quilt with some colorful patches. This is why people buy patterns and follow them.
I set this hot-mess quilt aside, and worked on a few other projects. I thought that I could quilt flowers in the large blank white spaces after attending the quilting class at the Quilt Festival. After ruining another quilt top while attempting simple flowers, I decided to forego that idea and keep that quilt top un-done. Then I attended a quilt guild meeting where the speaker spoke on applique. She made it look so good, and made it sound easy. I have appliqued placemats before but think of applique as either something for craft projects, or difficult needle turning on quilts - really, how do people have the patience and skill for that - I so admire it, but have no desire to do needle turn applique.
Anyhoo, I cut out flowers similar to the flowers on the print fabric and fused them to the quilt. I set to work adding the applique stitch from my machine to finish the flowers. I though this would be tedius and look sloppy, but actually it went really fast, and looked quite lovely! I am pleased!
Mumbo Gumbo -ish
Have you ever made something that just did not do it for you, but the rest of the world just loves it? Well, this little quilt follows that same story line. I attended a charity quilt event where some gals in a bee were creating blocks for a bunch of mumbo gumbo quilts. Mumbo Gumbo is a great scrap busting quilt, and is very forgiving. Here is the link to purchase the pattern: http://www.pieintheskyquilts.com/mumbogumbo.html. So, being a gal with a HUGE bag of scraps, I decided to follow the same concept as Mumbo Gumbo and create some blocks. I cut strips of my scraps, and made half square triangle squares out of larger pieces. I sewed and sewed and sewed. The way I sewed this was joining strips into one long piece, and put the HST squares under the strip on my sewing machine, and chain sewed until I ran put of squares. Then I pressed seams open, cut strips between the squares, and repeated the process as I sewed the next side. Then repeat. Then repeat. Then repeat. I learned much too late that I made way too many HST squares and as a result I ran out of strips before I was able to create even one largish block.
OK, this project had to be set aside until I created more scraps. Fast forward to completed blocks. I trimmed the blocks into squares, joined them, and created the quilt top. At this point I laid out this tedious quilt top and my husband came into my sewing room and commented (unsolicited) how much he like the quilt. Then my 17 year old daughter came in and admired it as well. Mind you, I had created really cute quilts prior to this -just scroll thru the blog... -which rarely got unsolicited praise from my husband. Anyway, I finished the quilt and used scraps for the back. I made bias binding from the rainbow striped fabric (OK, that part I LOVE). It turned out well. Who knows, I may make another one - I have a jillion small blocks waiting for new scraps to be added.


OK, this project had to be set aside until I created more scraps. Fast forward to completed blocks. I trimmed the blocks into squares, joined them, and created the quilt top. At this point I laid out this tedious quilt top and my husband came into my sewing room and commented (unsolicited) how much he like the quilt. Then my 17 year old daughter came in and admired it as well. Mind you, I had created really cute quilts prior to this -just scroll thru the blog... -which rarely got unsolicited praise from my husband. Anyway, I finished the quilt and used scraps for the back. I made bias binding from the rainbow striped fabric (OK, that part I LOVE). It turned out well. Who knows, I may make another one - I have a jillion small blocks waiting for new scraps to be added.
A couple more mug rugs
Well, now that I know I can make a mug rug, I decided to make a couple for my parents. I had this cute snowman face embroidery design, and thought it would be festive. I had seen something on Missouri Star about snowballing (I think that is right), where you add small triangles to the corners of squares, and it makes squares look rounded. Anyway, I am always up for something new so I rounded my snowman's face, and added cute leftover fabric from a jelly roll on each side. OK, these are not as well made as the ones for my swapee - sorry mom and dad, but they are very cheery!

Mug Rug Swap
I have decided to take a few more chances with my sewing. I recently joined a holiday mug rug swap. The way it works is that I make a mug rug for a stranger who also signed up for the swap, and someone makes one for me. From her posts, my swapee likes bells, and celebrates Christmas. I decided to use an embroidery design of a bell as my centerpiece, and coordinated the colors to a holiday fabric I had in my stash. Two comments on mug rug swaps - 1. They are small so there is less room to mess up, and 2. There is added pressure when you make something for a stranger - it cannot be as flawed as the items one makes for say, mom... Anyway, I took my time, chose colors carefully, and actually created a mug rug I can be proud of. I hope my swapee likes it. And I cannot wait to get mine in the mail. I will post a picture of the one I receive once I get it. Here is the one I made.


Sweet Quilt
Again, a stash search yielded another lovely charm pack - I don't even remember buying most of these... I created half square triangles, and sewed four of them into a square. For some reason I am drawn to a white background - could it be the impracticality of a white quilt... Anyway, once I finished the front I went to my local quilt shop - Quilt Emporium - to find a great backing fabric. I searched for yardage of the un-named fabrics, thinking I would use the teal fabric. But, thriftiness led me to the sale rack and I found this neat green fabric. I thought it added some quaintness to the quilt, and at 1/2 price, I can save money and buy more charm packs.
I went to a class on machine quilting at the International Quilt Festival. I learned quite a bit. I also learned that I am not that good at drawing. Lastly I learned there is a world of difference between quilting on the super-duper amazing longarms supplied at the festival and the rinky-dink eBay DIY short-arm that I created using various sources. Having demolished a quilt top thinking my long-arm skills would transfer, I opted to stitch in the ditch on this one. These straight(ish) lines worked well on my machine, and the frame did a great job holding my sandwich together well.
To complete the quilt, I first watched a video on bias binding. All in all, it turned out pretty well.
Kaffe Fassett Big Star Quilt
I have fallen in love with Kaffe Fassett fabrics. Besides their vibrance, the chaos of the prints hide many an error! Yay! I saw the Big Star Quilt on Missouri Star's website and had to make a quilt using that layout. I used yardage of Kaffe's fabric, and wanted to go bold. I tried out the stars with the pink-orange sashing (first picture). But then decided the shapes created without the sashing (second picture).
All in all, I love this quilt top. It may be the best one I have ever created. Now if I could only get my quilting machine working again...


All in all, I love this quilt top. It may be the best one I have ever created. Now if I could only get my quilting machine working again...
Simply Color by Moda and Orange Quilt
If you are like me you cannot resist a cute charm pack. I was going through my stash and found an adorable charm pack - Simply Color by Moda. I wanted to show off the charms in their entire glory so I just sewed them together in fours and bordered them with an orange batik. It turned into this cheery easy quilt. I am pleased, both with the simplicity and the result. Now I need to quilt it.

Tuesday, October 1, 2013
Fall Placemats
I created these fall placemats this evening. I had the striped linen fabric from a grab bag at a local home dec fabric store. The odd shaped remnant was not enough to cut placemat sized rectangles but was enough for me to cut the horizontal striped squares and vertical striped side pieces. It actually mad for a nice effect. I had strips left from the table runner project so I sewed them together and fused iron on adhesive to the back, drew as many pumpkin shapes as would fit on the sheet and cut them out. I used more of the leaf fabric, again fused and fussy cut. I laid it out on the rectangles and ironed them on. Next I sewed my "sandwich", turned it and added topstitching around the perimeter. I then started some decorative stitches around all of the applique. At that point I realized that a single large pumpkin and a couple of large leaves would have been much easier to stitch around than all of these small pieces. And, (yea!) only 4 of these to do. Well, I got through the first 3 placemats, and just need to stitch around the applique on the 4th. Maybe I will finish it tomorrow, or since we are a family of 3, why do we even need 4 placemats!


Sunday, September 29, 2013
Kaffe Fassett Quilt Top Done!
I finally settled on an arrangement for my Kaffe Fassett Jelly Roll triangles that I made. I had a burst of energy today and arranged, pinned, and sewed my strip sets. I was still undecided about my background fabric so I visited a local quilt shop that is open on Sunday's. Two lovely ladies who worked there advised me on my background color. We settled on this lovely Kaffe Fassett purple print - we all agreed that something that "read" solid was needed, and I loved the coolness of the shade of purple. Once home, I cut the background triangles ande finished the quilt top. Quite frankly, to me it is a masterpiece! Here it is. Tah Dah!


This is the quilt top in progress.
Kaffe Fassett Quilt Back Done!
I love, love, love the quilt back of my Kaffe Fassett Quilt. The large purple field broken by the left-over triangles from the front make a powerful burst of color. I plan to fire-up my pieced together "long arm" machine (after a few trial runs) to quilt this quilt. Of course I could chicken out at any time and stitch in the ditch. You may ask, "what long arm"? Well, it's a quilt frame I purchased off ebay, with an ebay sewing machine with a bit wider throat than my embroidery machine. I have had it about a year but have not fully figured it out. Yes I have quilted a few lap/baby quilts, but not as beautifully as I had hoped. I plan to attend a free arm class at the International Quilt Featival to up my skills. It may be after the Quilt Festival that I quilt this piece. It's all good!


Quilt Guild of Greater Houston Charity Quilt Day
Today was a great day! I brought my machine to a local church and participated in the QGGH Charity Quilt Day. Folks bring sewing machines, and a potluck dish. Some folks sewed quilt tops, others quilted, and others added binding. We all worked on different projects. I was able to complete three quilt tops and one quilt back in the 6 hour session. Quilt pieces were pre-cut and placed in ziplock bags with instructions. I just had to grab a bag and sew. These quilts go to a number of Houston charities - helping our homeless, children removed from homes and awaiting court appearances, and visitors to Houston who are going through treatment at MD Anderson, or awaiting a transplant at one of the other hospitals. These tend to be lap quilts meant to give comfort to those who receive them. The event was great fun - I like to chat while sewing. What a great group of women! Here are pictures of my completed works. One of the women was able to quilt my first quilt top that day, so I have a picture of the quilted quilt.


Saturday, September 28, 2013
Modern Quilt - a little fix here and there
Well, my modern quilt had a few areas where the stitching went a bit askew - I used the 4-way sewing stitch on my machine, and kept forgetting to hit the reverse button. Anyhoo, I
"un-sewed" a few of the more obvious places and re-sewed them. Now I am happy!
"un-sewed" a few of the more obvious places and re-sewed them. Now I am happy!

Sunday, September 22, 2013
Quilt in Progress
 I am in the process of creating a quilt. I sewed together sets of 4 strips from a jelly roll and cut those joined strip sets into equilateral triangles. I had planned to create a prism pattern I had seen on the internet, but once arranged, the pattern was lost with the Kaffe Fasset print. Here is arrangement one.


Houston Modern Quilt Guild Swap Freebies - Small Quilt
My pal, Grace and I had the pleasure of attending our first meeting of the Greater Houston Modern Quilt Guild. What a great group of women. They are very talented and so warm and welcoming - like a cozy quilt! After the business portion of the meeting they held show and tell. One gal made a pair of pillow shams - with the Hugs Before Kisses quilt pattern. The next gal shared her quilt and low and behold, it was the same pattern - and together it was a gift for a member who got married last week. How sweet is that? Anyway, I was intrigued and inspired by the many show and tell quilts.
They closed out their meeting with a garage sale/swap. This being our first meeting, Grace and I had nothing to give. A few of the gals allowed us to take a few items - I took some binding, a few fabric pieces, and 3- 2 1/2" strips. I had much guilt taking without giving, but was assured by the donor that it was ok. Well, that guilt led me to make sure that I made something with my freebies. I immediately came home, found a coordinating fabric for the strips, and made a small quilt - a good size for a tiny baby or a pet. Here is a picture of it. This inspired me to have some sort of swap that included 3-4 strips, a couple of fat quarters and instructions to "create!" It would be fun to see the variety of items people came up with. Hmmmm...

Sunday, September 8, 2013
Table Runner of Valor
 Yea! I finished my Table Runner of Valor. And I am please with how it turned out. I do not have anything red, white, and blue to set out on patriotic holidays. I may keep it. I may make it a gift. I need to bond with the finished product before I determine it's fate.
Saturday, September 7, 2013
Table Runner of Valor
I am in the process of making this table runner using a standard quilt block. As usual, I winged it on creating it. This time, big mistake. I ended up cutting the longer sides of the blue/white triangles on the bias - I need to listen to the wisdom of Fons and Porter. The quilt square is a bit wonky because the fabric is stretching. Instead of re-doing it, I am moving forward. It is still a work in progress. I will post the final product when I finish!
.JPG)
.JPG)
Baby Quilt
I am a Fons and Porter addict. I watch their Love of Quilting show every Saturday morning. Recently they featured a baby quilt similar to this one. I am not one to follow directions, rather I like to see something I like and try to re-create it by winging it. This method is not always successful, but this time, I think it did. I like the way the colors show up against the white background. I also liked how easy the colorful strips were to make - I had a Moda charm pack and cut each charm in half to create this. I sewed the pieces to a paper foundation. F and P created a scalloped edge around this quilt, and made creating and sewing a scalloped border look easy to sew. It was much easier for them than it was for me. I even re-watched the episode as I labored through the process. I worked diligently over a few days creating the well spaced scallops around the quilt. I slowly added the bias binding around the scallops. Once the first part of sewing the bias tape on was done, I did not like how messy it looked. I ended up ripping off the bias tape, cutting the scallops off, and binding it nice and rectangular. Much better. I did create the bias tape from 1/2 a yard of fabric. I followed the instructions on youtube. It was very easy! I plan to make my own bias type from now on. I show a picture of the back of the quilt as well. I planned to add little bits of color to the back. Serendipitously I did not have enough white fabric, so it was a happy accident. I am pleased with how well this quilt turned out.
.JPG)
.JPG)
Fall Pumpkin Table Runner
I saw something similar to this on the web and thought I would re-create it. I appliqued the pumpkins on after piecing the blocks. I had a fat quarter of a leaf print fabric that I fussy cut to mimic the shape of pumpkin leaves. I quilted the lines on the pumpkin once the applique was sewn on. Although it turned out pretty cute, I definitely should have used a pattern rather than winging it. It took much time. I am glad this project is done.
.JPG)
.JPG)
Pillow Cases for Camp
My daughter went away to camp and I made pillowcase for her roommates. They loved them!


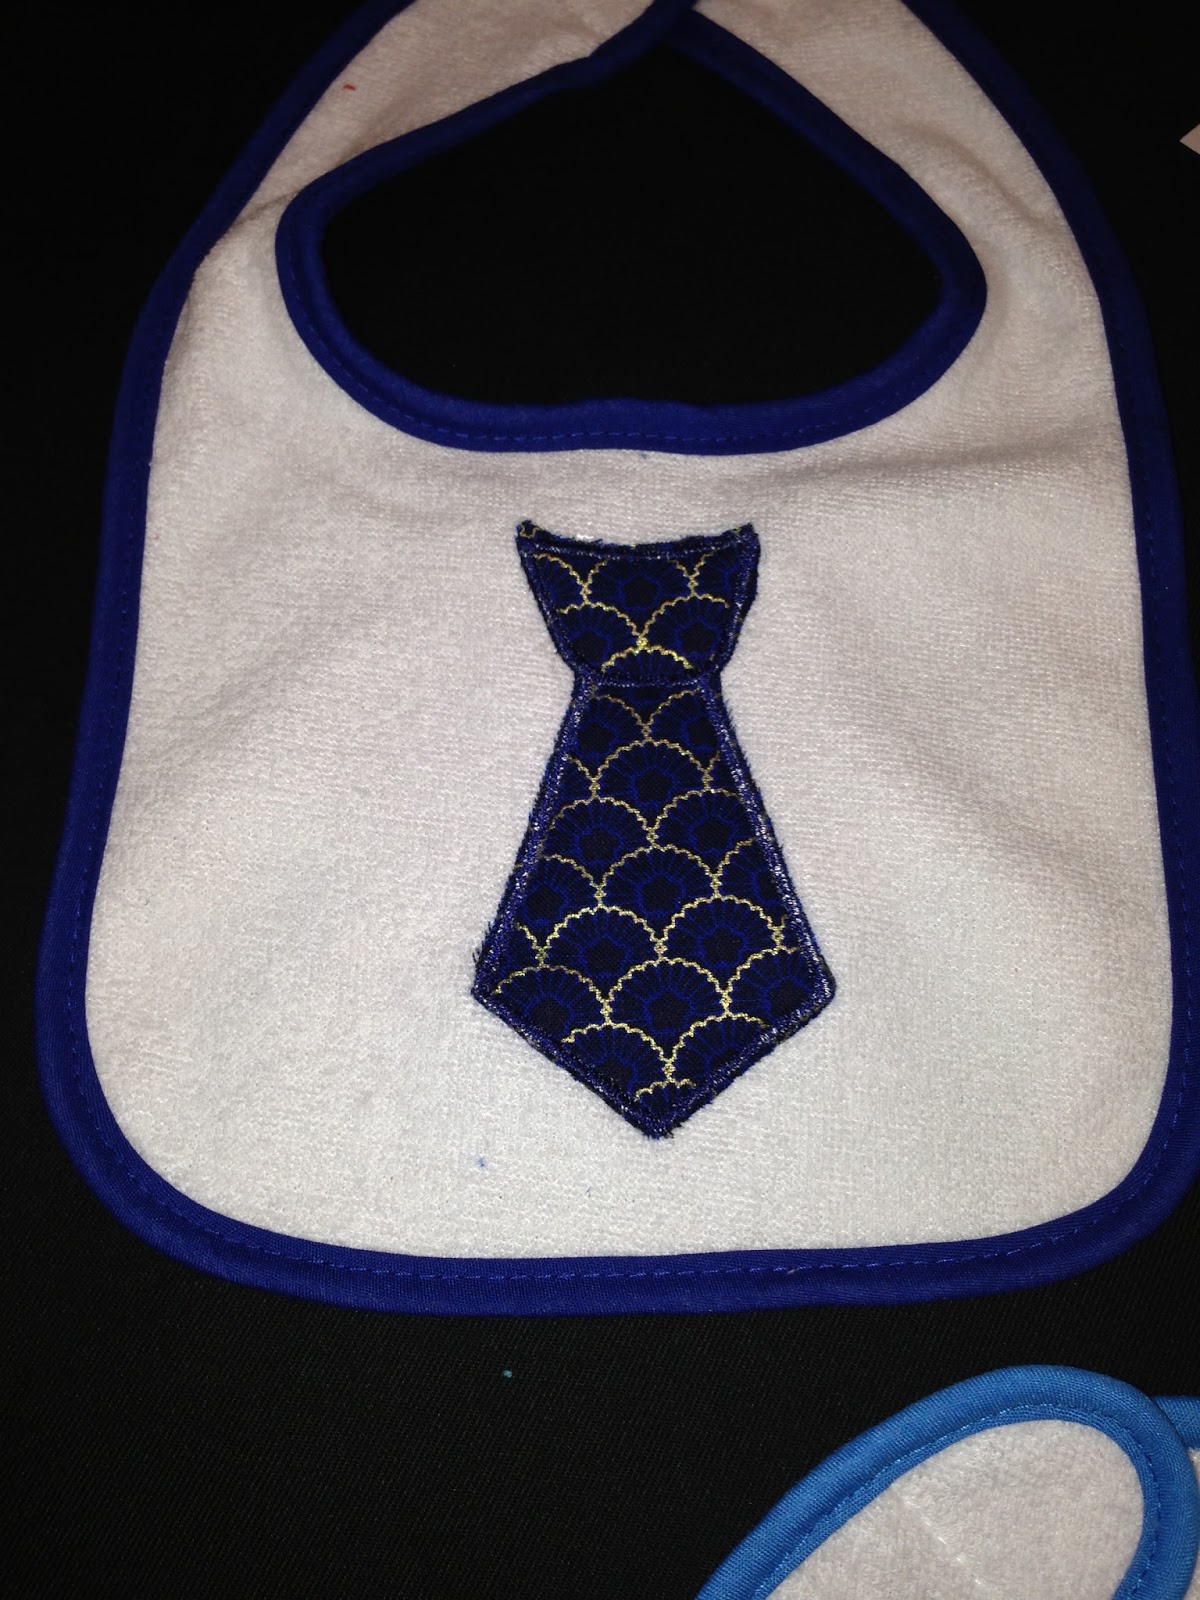
Bibs Bibs Bibs and Burp Cloths


.JPG)
.JPG)


Subscribe to:
Posts (Atom)